Last week we explored what are the advantages of integrating Magento with a POS system. In this article, we will walk through a recent project that illustrates the finer points of this type of integration, including helpful steps and illustrative screenshots.
Recently a client of ours, whom we had previously developed a Magento online store for, opened a showroom where customers had the opportunity to try various clothes and outfit combinations with the assistance of a professional stylist. When a customer was ready to make a purchase, a sales person performed the purchase directly from the Magento backend. This proved to be a time-consuming and error-prone process. In order to make the retail sale procedure more efficient, we introduced our client to a solution that integrated a POS system with their existing Magento implementation.
Top priorities for this project included: (1) introducing a POS system that shared the same stock inventory as the online store with the ability to define products that are available in both the online and retail stores (i.e., the client’s show room); (2) to support an Authorise.Net payment gateway; (3) to have special tax handling separated from the online store’s tax handling; (4) to provide special shipping rates; and (5) enhanced with strong security.
In addition, the system also needed to handle gift cards and promo codes, reordering and returns, multi-card payments, refunds, and more.
After further investigation and research, our team discovered that the most optimal solution for this scenario would be to integrate the Ebizmarts POS system with the Magento online store.
This article will review the procedures of installation, integration, and some basic concepts which were necessary for our new POS system to work properly.
- Installation & Integration of Ebizmarts POS and Magento Online store
This process can be split into three major steps:
- Installation of the Magento — eBizmarts POS extension
- Configuration of eBizmarts POS backend
- Installation of POS App on device
Installation of Magento — Ebizmarts POS Extension
As with any other Magento extension, it needs to be downloaded from Ebizmarts’ official download page (at the time of writing, this page was available at: http://pos.ebizmarts.com/docs#POSapp) and then installed in the Magento backend through Magento Connect Manager.
- To login to Magento Admin, go to System / Magento Connect / Magento Connect Manager:
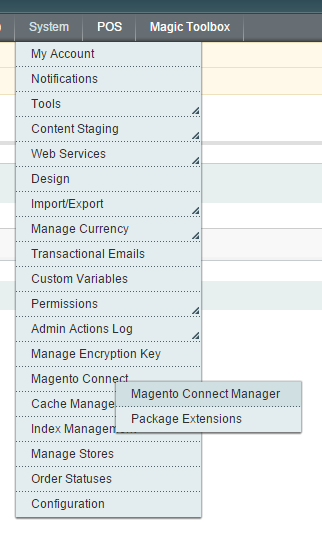
- Next, navigate to Direct package file uploadand choose the extension you previously downloaded.
- As soon as the extension is uploaded, the POS tab menu item will become visible in the Magento backend.
- Go to POS / Configurationand setup following major settings:
- In Generaltab:
- Enable– Set to
- Reset API Key– Select this to generate a new API key and save the configuration.
- Generate Activation Key – Select this to generate an activation key, which you will later need during configuration of the Ebizmarts POS backend. It will be used to connect the POS and Magento systems.
- You can also setup:
- Allowed APIs– Setup specific IP addresses to increase site security.
- Debug– Enable the debug log.
- In Generaltab:
Configuration of the Ebizmarts POS Backend
- Login to the Ebizmarts POS backend (credentials are provided during registration) and click on the Storesmenu from the left side menu:
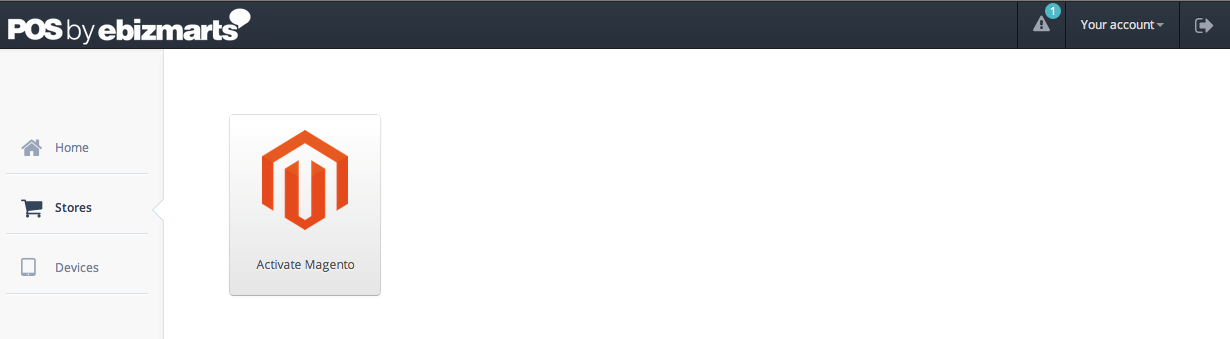
- Click on Activate Magento,to open the dialog window and enter the Activation Key. Enter the specific key generated in the previous step. As soon as this step is performed, Ebizmarts will connect with Magento and show available Store Views from your Magento online site. You can manage the Store Views from the Magento backend (System > Configuration > General > Store > Information).It is a good practice to have separate Store Views for the retail store (which will be explained later in this post):

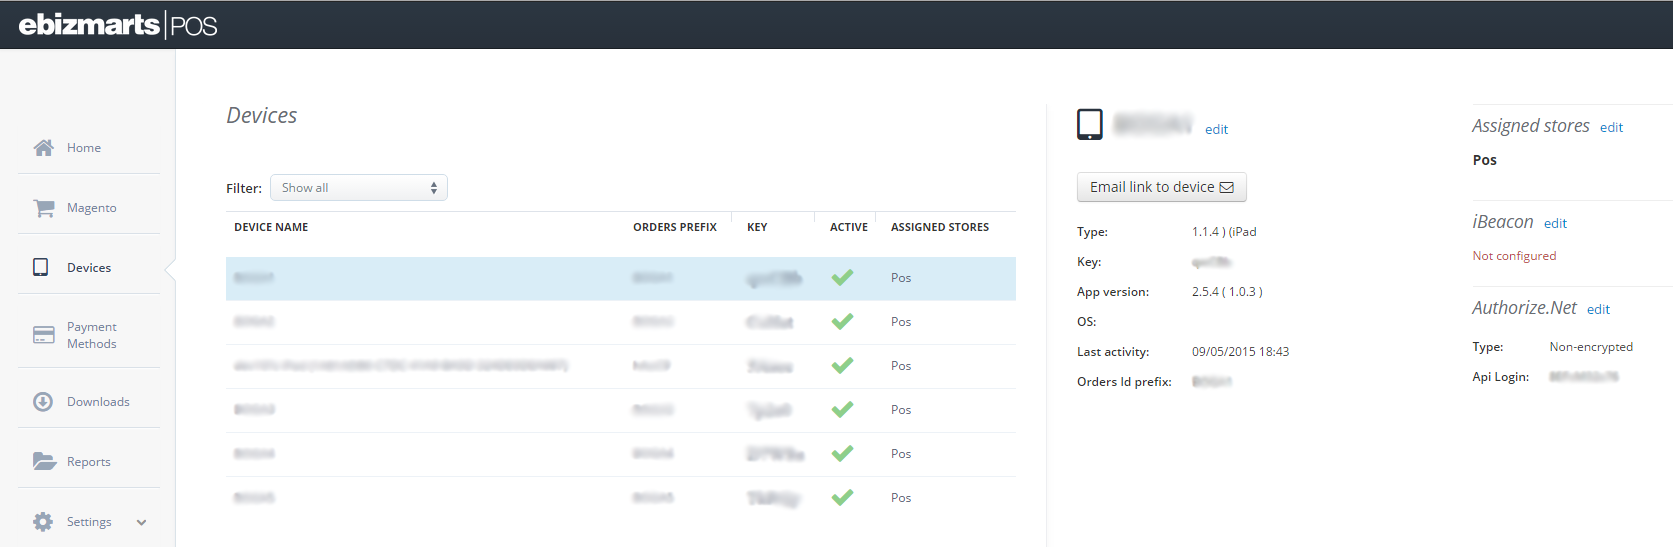
- After selecting the appropriate Store View, the next step is to define the devices you want to use with the POS system. The number of devices that can be used depends on the pricing plan you have selected. Click on the Devicestab to define the selling point device(s).Each newly added device will get assigned an Activation Key, which will be needed later during the app’s installation on the device. You can also use the option to email a link with the activation key by clicking on “Email link to device” button, which can be then opened on the device.
Installation of the POS App on a Device
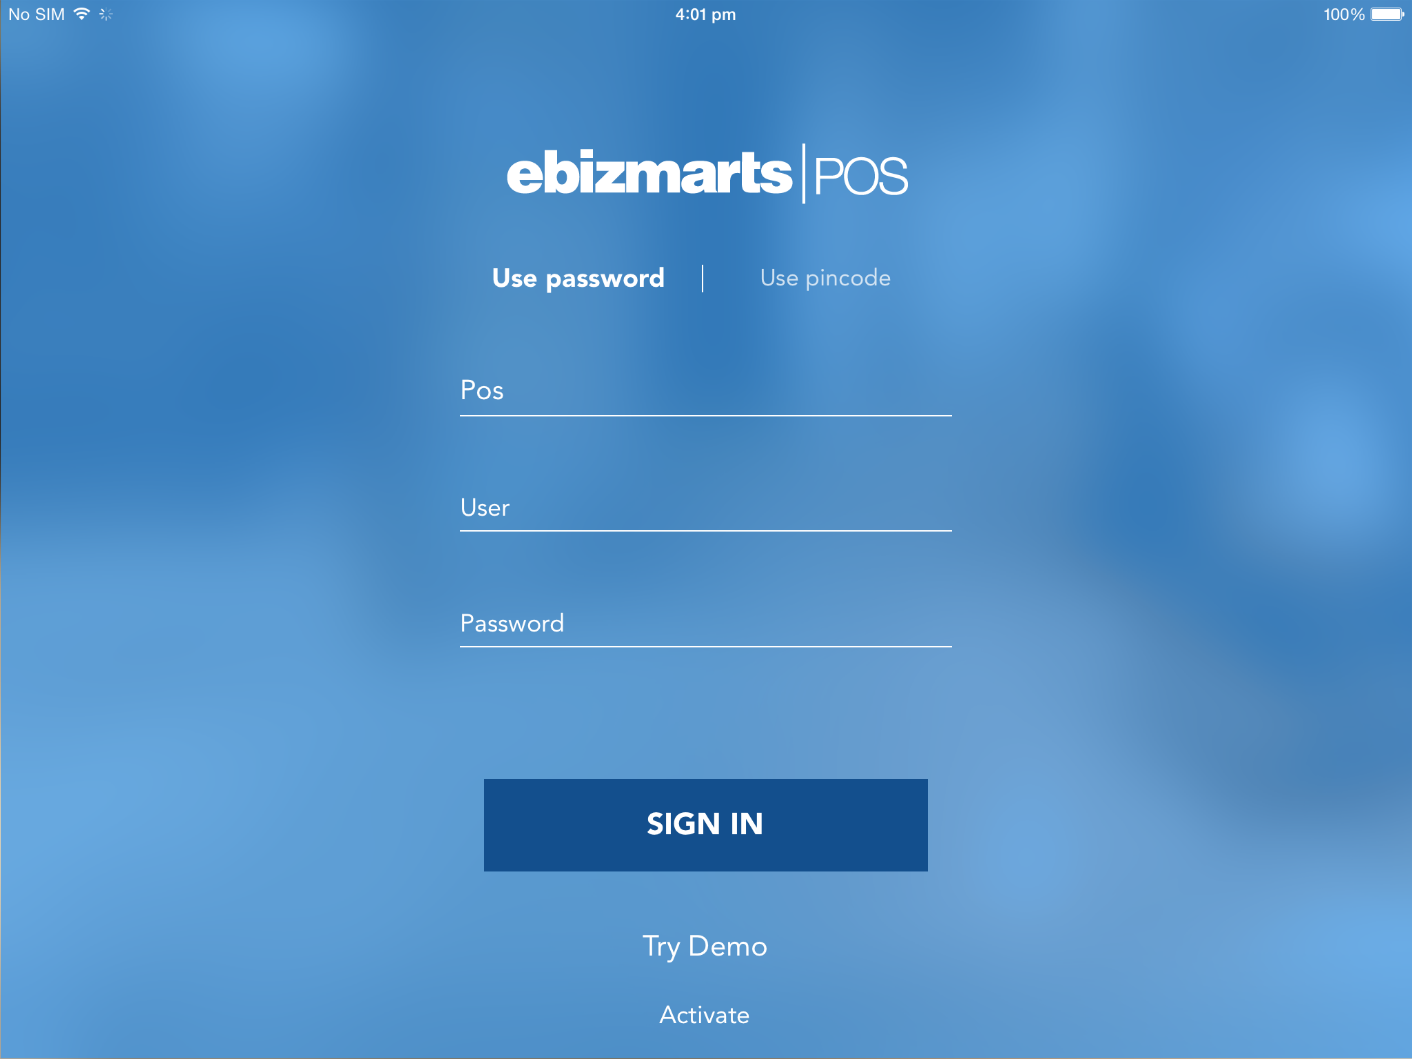
After you have set-up the Ebizmarts backend and generated an Activation Key, you can download the POS app from the Apple Store. Follow this procedure on the device(s) you want to use and activate the device with the Activation Key. After the POS device and POS backend are connected, the same activation key cannot be used with another device. If you want to change your device and have purchased a plan with a limited number of devices, you can simply reset your device key from the POS backend.
Now you can login with your standard Magento administrator username and password to the app:
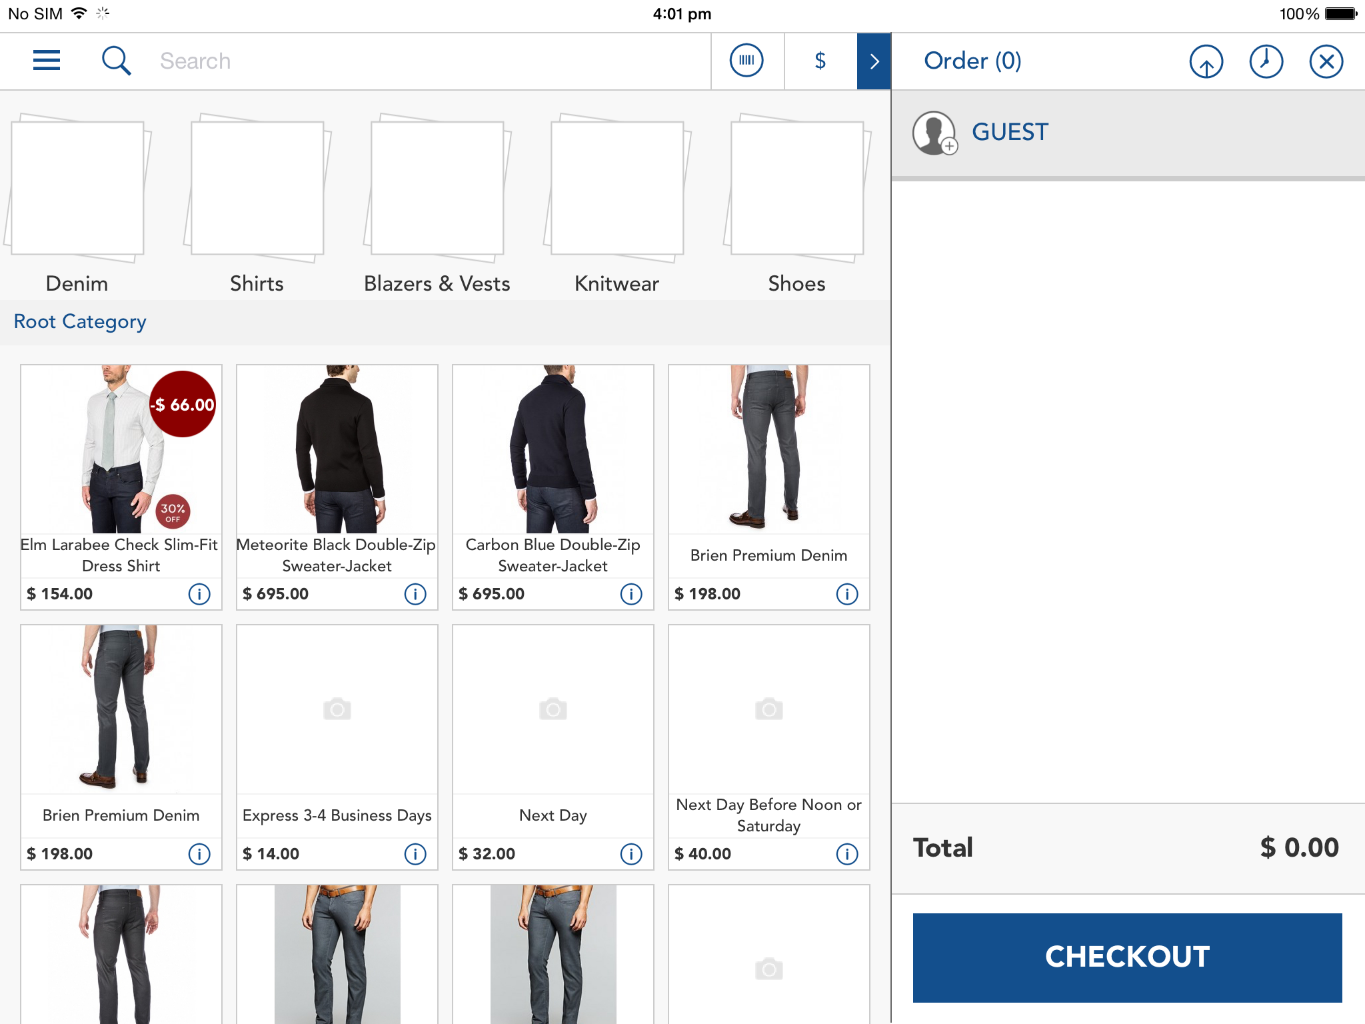
If the Store View has been properly selected during the backend configuration, you will be able to see categories and related products from your Magento Stock Inventory in the POS App:
At this point, synchronization between POS and Magento has been established. A payment gateway, tax, and shipping handling still needs to be setup to finish the process.
- Adding Store View for POS system – POS Tax handling
There are a few scenarios when it is good practice to have a separated Store Views for the online and retail stores:
- The client has used a specific tax calculator for their Magento online store where tax was calculated per billing address, and the same tax calculator was not supported by the Ebizmarts POS system.
- An additional Store View has been created with a disabled tax calculator, and the Magento configuration had the same tax applied to all products enabled for its Store Views based on the Retail Store location.
- The online Store View has not been setup, and its tax handling has been handled as before with tax calculator based on the billing address. Meanwhile, the POS Store View has been configured with use of fixed taxes defined in Magento’s backend which were dependent on Retail Store location.
In addition, we have prepared a special categories of products which are enabled for POS and/or for online Store Views.
The following steps describe creation and basic configuration for Store Views in the Magento backend:
- Go to System / Manage Stores.
- Create a Store View by clicking on the Create Store Viewbutton; finish the creation by giving the new Store View a name (e.g., “POS Store”).
- Go to System / Configurationand select your newly created POS Store View in Current Configuration Scope(found in the upper left area).
- Select Webin Generaltab and change Base URL in Unsecure and Secure tabs (e.g. http://pos.sitename.com/).
- Payment Method Configuration
The Ebizmarts POS system supports several payment methods, including Sage Payments, Authorise.Net, and Stripe. One of our project objectives was to support Authorise.Net as it was already in use in the Magento online store.
To setup Authorise.Net for Ebizmarts POS, take the following steps:
- Configure Authorise.Net for Ebizmarts POS on Magento side
- Configure Authorise.Net on Ebizmarts POS backend side
Configuration of Authorise.Net for Ebizmarts POS on Magento side
- Login to Magento Admin backend with administrator credentials and go to
System / Configuration / (select configuration scope) / POS BY EBIZMARTS / Payment Methods and enable Authorise.Net CHP and Cash in Hand by opening appropriate tabs and setting Enabled property to “Yes” as it is shown on image below
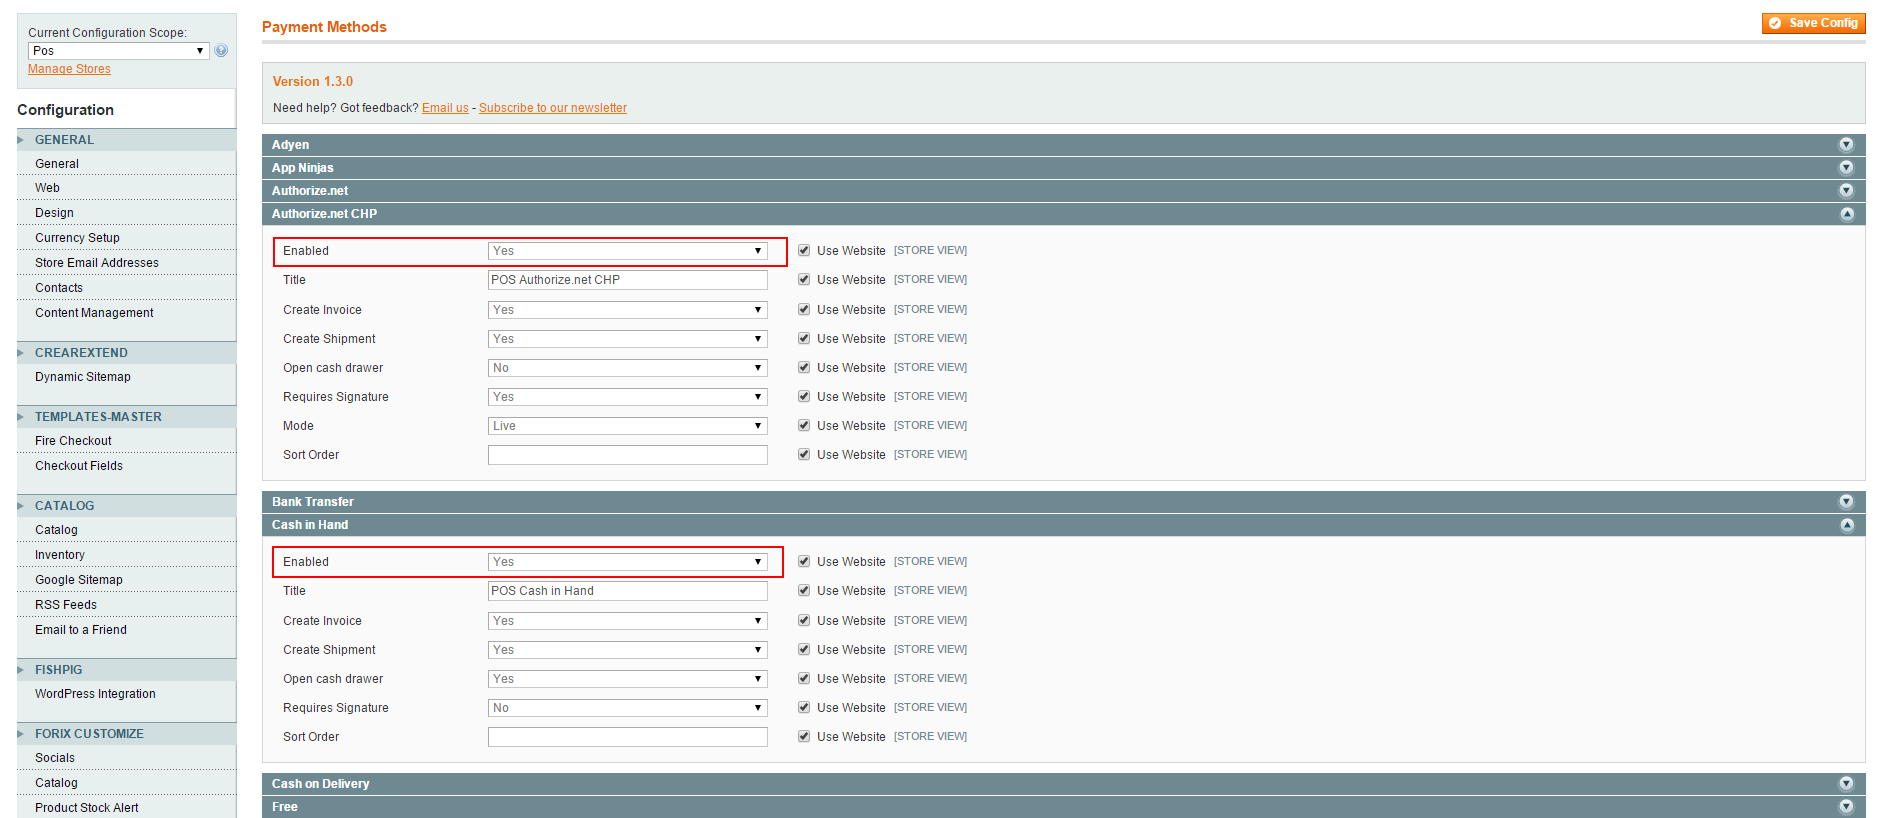
**Note that the setup described is an upgrade to an already existing Authorise.Net setup for the online store, which is expected to be configured with the Authorise.Net API Login and API Transaction Key under System / Configuration / configuration scope (can be default) / Sales / Payment Methods / Authorise.Net.
Configuration of use of Authorise.Net on Ebizmarts POS Backend Side
- Login to Ebizmarts POS Admin.
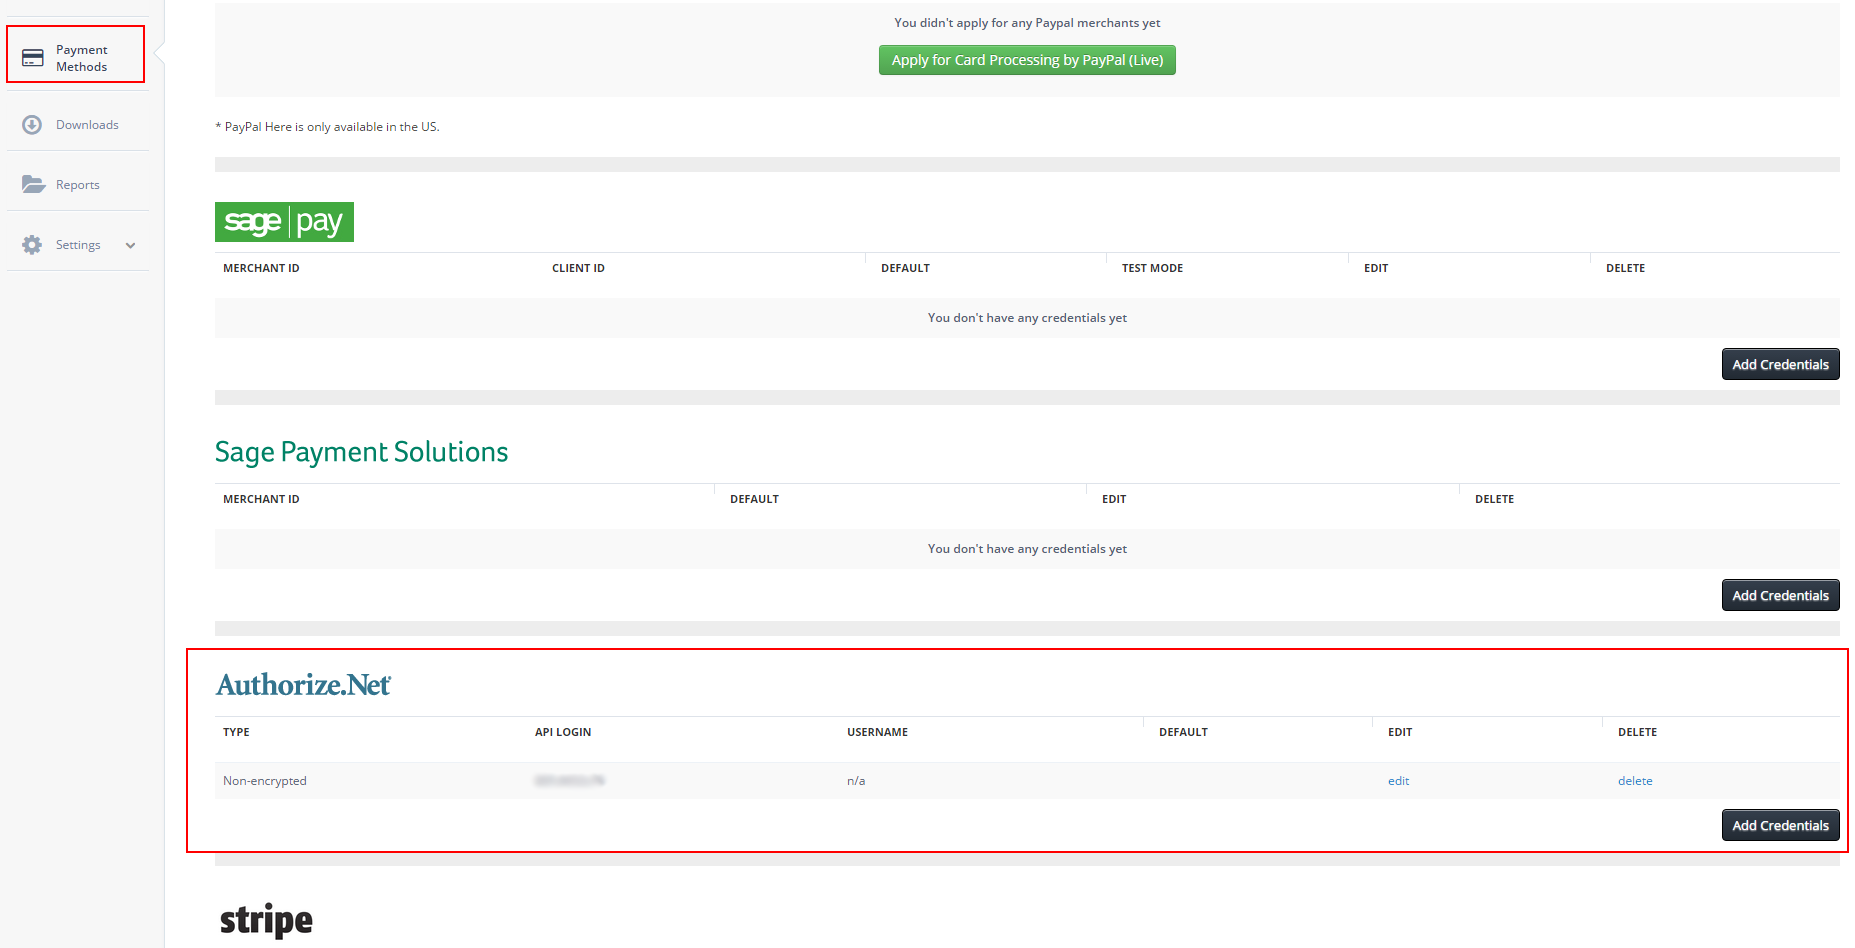
- Next, open the Payment Methods tab and configure the Net payment method by adding the same credentials used on the Magento Admin side.
- Shipping Method Configuration
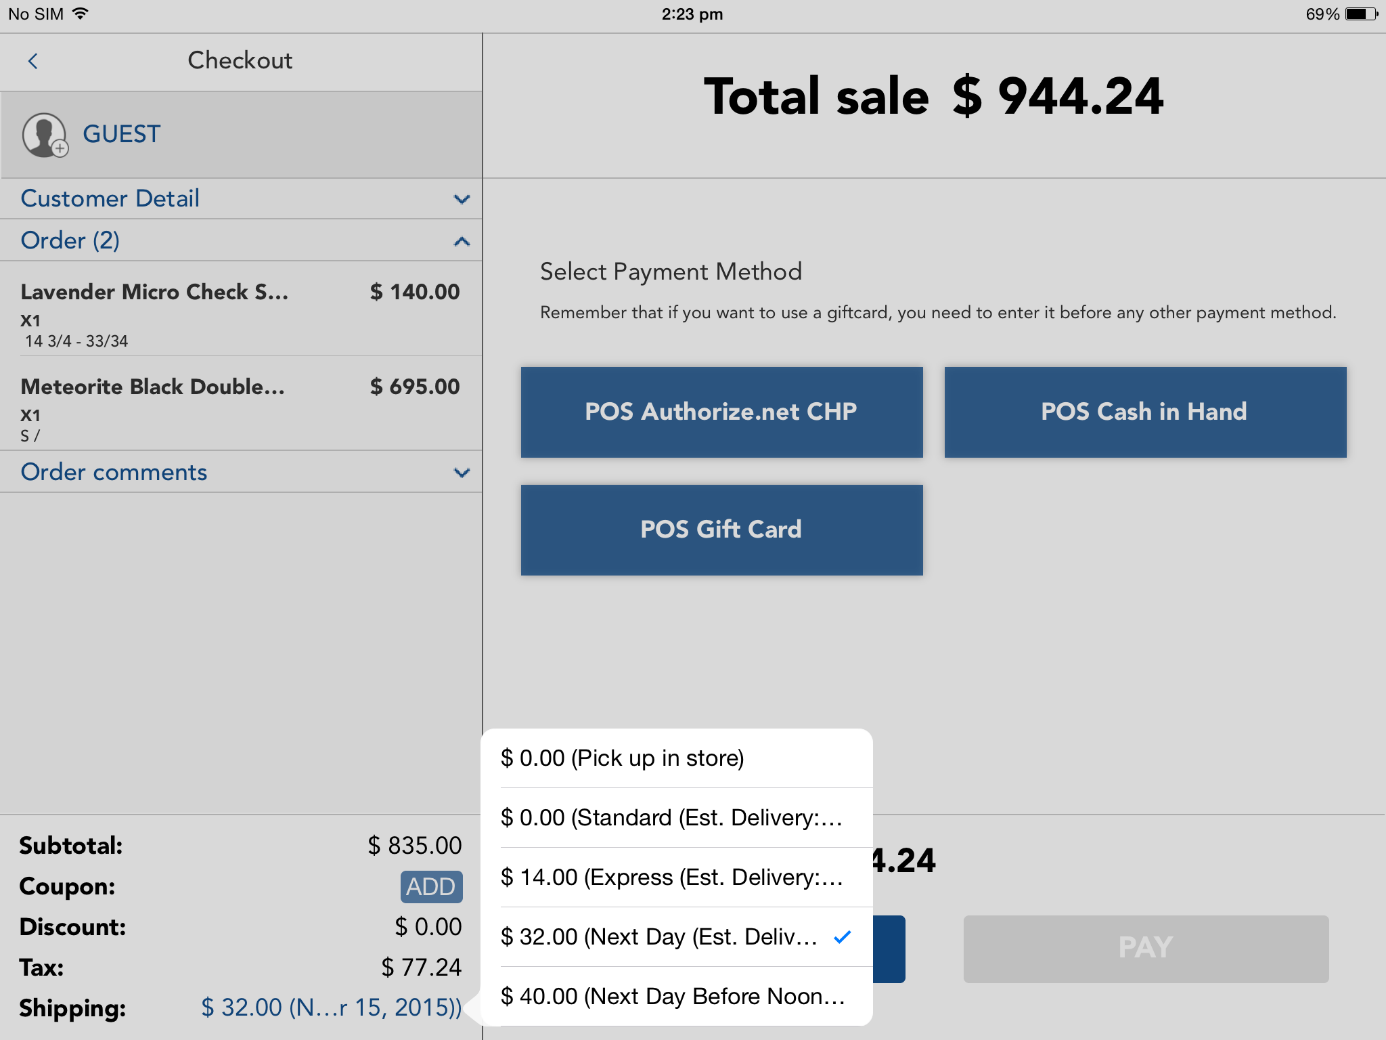
Ebizmarts POS will retrieve shipping costs from Magento by default. In our previously illustrated project scenario, the client was using Custom Table Rates for shipping in the online store, and rates were fetched by the POS system (pictured below in a screenshot taken form POS App).
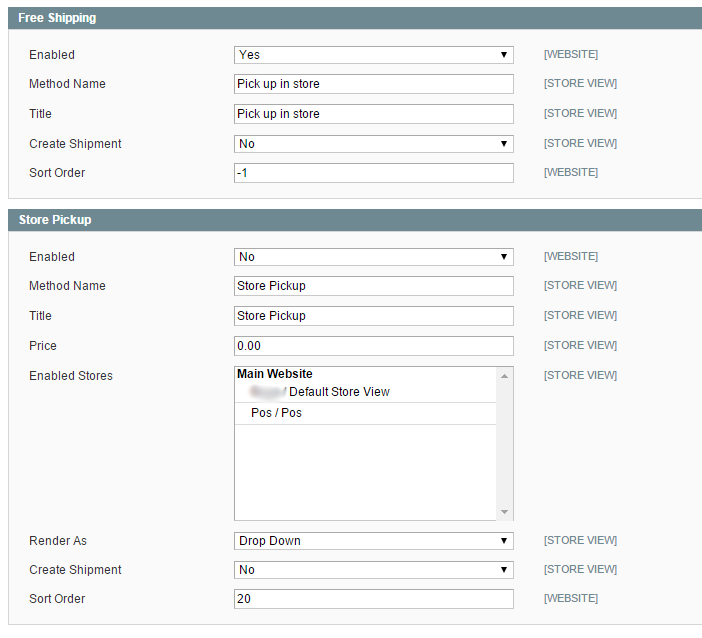
In addition, we can setup Free Shipping and Store Pickup options in Magento Admin under POS / Configuration / Shipping Methods /.
Free Shipping can be used if the client wants to provide an option for product shipping, or a product was sent to another location without an additional shipping cost (in that case, the client will take care of shipping cost). Store Pickup can be used as an option when a customer leaves the Retail Store with a product in hand. Another setup option is to create an auto shipment with the option of setting up custom price.
For example, in our project we enabled Free Shipping and combined it with Custom Table Rates shipment options from the POS system. Information visible in the screenshot (pictured above) as “$ 0.00 (Pick up in store)” where “Pick up in store” is the value defined under Title property in Free Shipping section (below screenshot).
- Authentication and Security
Ebizmarts POS backend communicates with the Magento online store via API by exchanging an encrypted API Key. The same API Key is transmitted to all registered devices where Ebizmarts app is installed, using the encrypted Device Key (a Device Key can be assigned to only one device).
In order to additionally increase security, Magento admin can define a list of authorized IP addresses from which requests to Magento can be made (previously mentioned in the “Installation and Configuration” section – Allowed IPs).
Simplify and Streamline Your POS System
Providing a smooth transaction process for your retail customers increases the likelihood of repeat business. Equally as important, integrating your online and retail store technology will make your business more scalable, functional, and successful in the long run. FarShore Partners has expertise in building customized websites, mobile apps, and e-commerce solutions that support business owners. Contact us today to begin the consultation process!


[…] that support business owners. Contact us today to get started, and make sure to stay tuned for guide on Ebizmarts POS and Magento integration coming next week! Tomislav Marjanović Tomislav is Farshore Software Architect, involved in the […]