You have built a web shop, and now it’s time to add all the products. After considering product names, categories and attributes, it’s time to make them as visually presentable as possible. Of course, we’re talking about product photography. Regardless of how great your product is in real life, it’s only as good as the photo that your potential customers will see when browsing your online store.
Ideal product photos show the product, well-lit, on a white background with plenty of white space on all sides. The white space is necessary to allow you to center products of varying shapes while keeping the same relative size. Unless there are specific reasons for doing something different, it’s recommended to follow these principles. Also, if you wish to display action shots of your product, keep in mind how will they look stacked together in a grid view or on a category page. You can always include multiple photos for each product, but the first one that is displayed in all views should share aesthetics with the rest of the products.
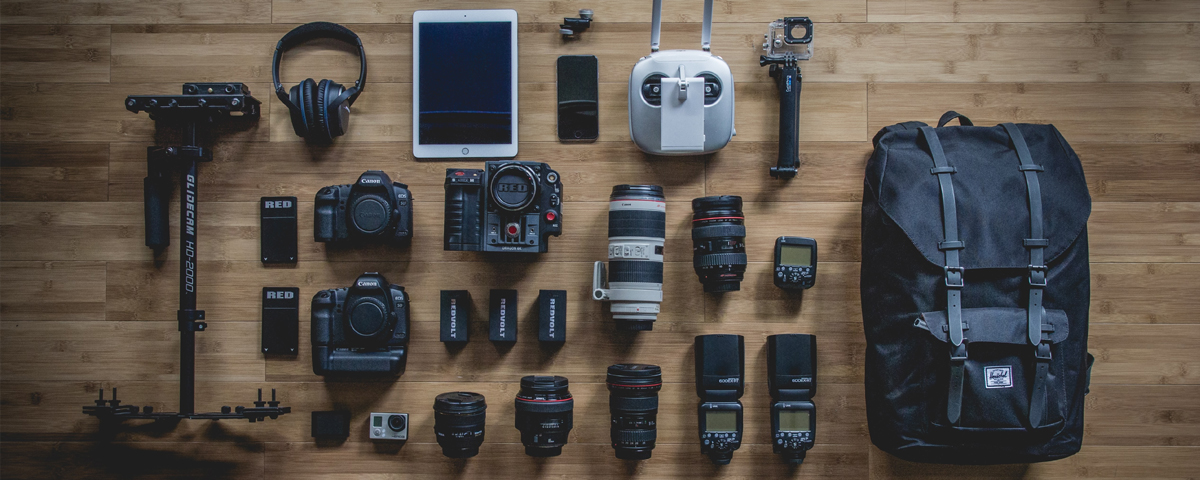
If you’re in a situation where you’ll need to do this work alone and don’t have much experience,don’t worry; a lot can be achieved even if you’re working with a consumer grade camera or a mobile phone. If you have a DSLR, you’re golden, but you can make it work regardless. Let’s get started!
What do I need for product photography?
If you’re using a DSLR and have multiple lenses to choose from, pick one that is not wide-angled as you’ll want to avoid distorting the image. Also, it would be best if you have a lens that allows you to step back and take the photo from a bit of a distance. A portrait or a zoom lens is a good choice. The ideal lens also depends on the distance you’ll be shooting from – basically on how big your product is, as it needs to fit the frame.
If you have a tripod, this is a good opportunity to use it. It will help you to keep your shots steady, and having each photo taken from the exact same spot will be helpful in post-processing. This goes for any kind of camera or phone – if you can set it up with a tripod, you should.
Light and background
Before you get started, you will need to find some good light and set up the background. This depends on the size of your product and the space you’re shooting in. If you have window with some free space next to it, then a window-side setup is a great choice. If this kind of setup just doesn’t work for you or your product looks best under strong light, you can use a light box setup.
Window-side setup
For the basic setup, daylight is the only light you’ll need, so make sure you have free space next to a window to set up your shot. The best position for a shooting location is parallel to the window or 90 degrees from the window, so that the sunlight covers the wall you’re setting up against.
You will need to find a horizontal surface (any kind of desk will work) and a sheet of white paper (the size depends on the size of your product). The goal is for the white paper to cover the surface on which the product stands and the the visible area behind it. This will ensure a uniform white background with no visible transition between the horizontal surface and the background. You can tape the white paper to the background wall or hang it, then fold it softly to cover the surface where you’ll be placing the product. You can take a look at this backdrop tutorial if you need more details on the setup.
Light box setup
If you don’t have enough daylight or a convenient window, you can improvise a bit to set up a light box. A light box may come in handy if you need to avoid reflections, or if your product is something that looks best under strong light, like jewelry.
When building a light box, the main principle is diffusing the light that is coming in from the sides and the top of the box, while isolating the back of the box so that no light comes in from the back or the bottom. You can make the light box from just about anything, but to make it easier, here is a cardboard light box tutorial for which you’ll need a cardboard box, white paper, black paper, and some lights. You can also check out this IKEA hamper light box tutorial in case you have this hamper or something similar laying around.

General thoughts on light
Regardless of the setup you’re using, you may face some common issues. For example, the light may come off too harsh in the photo – in that case, you’ll need to diffuse it. Maybe not all angles can be covered with the light source(s) you have -in that case, you’ll need to reflect it.
Diffusing the light: if parts of your product are left overexposed (fade to white in the photo) or if there’s too much glare, you’ll need to diffuse the light. The easiest way to do this is to put something white and semi-transparent between the light source and the object; a sheet (or multiple sheets) of white paper will do just fine. If you’re using a lamp or camera flash, the same applies, but light diffusers may be better in this case.
Reflecting the light: if there are dark areas on your photo and if the product is not well-lit on all sides, you’ll need to reflect the light. If you have a reflector it will come in handy now; if not, you can use any reflective surface, such as aluminum foil. Keep in mind that the color of your reflective surface will affect the light color, so avoid using anything colored.
Light temperature: it’s best to keep light consistent by using only one kind of light source. If you’re using artificial light, make sure that all the lamps you use have the same kind of lightbulbs. However, this does not apply to flash; you can use flash without worrying much about other, less significant light sources.
Preparing your product
So, we have everything set up and ready to place the product in the center of the backdrop or the light box. Before placing it there, make sure to clean it and dust it off as any specks could be visible in the photo. Do the same for your camera and make sure that the lens is clean of dust and any specks.
If the product doesn’t look good standing on its own, you’ll need to prop it up, either by placing something behind it, or even hanging it on threads. You can be creative as you like here; what’s important is that you have your product placed so that it looks good.
What kind of settings to use on your camera
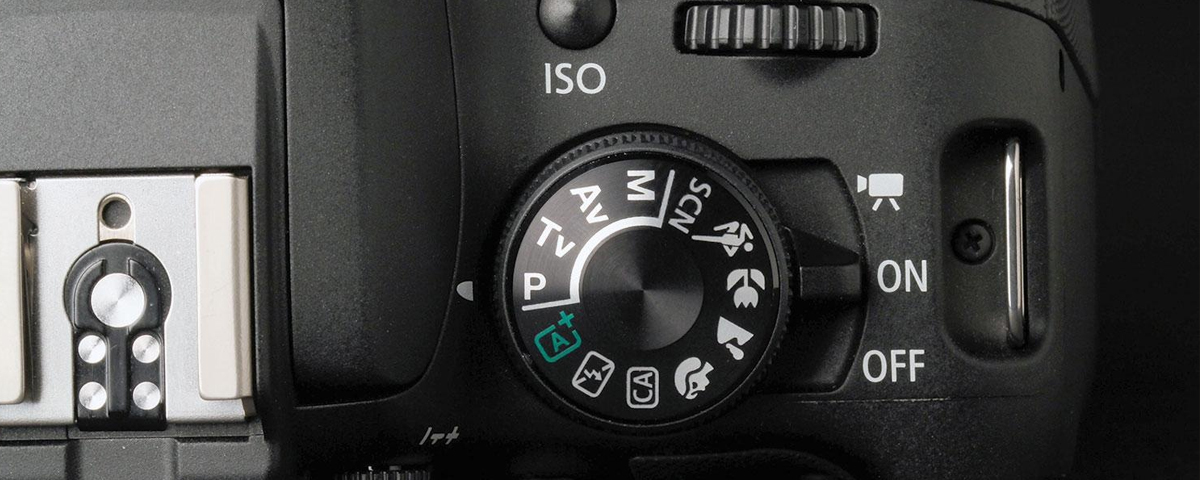
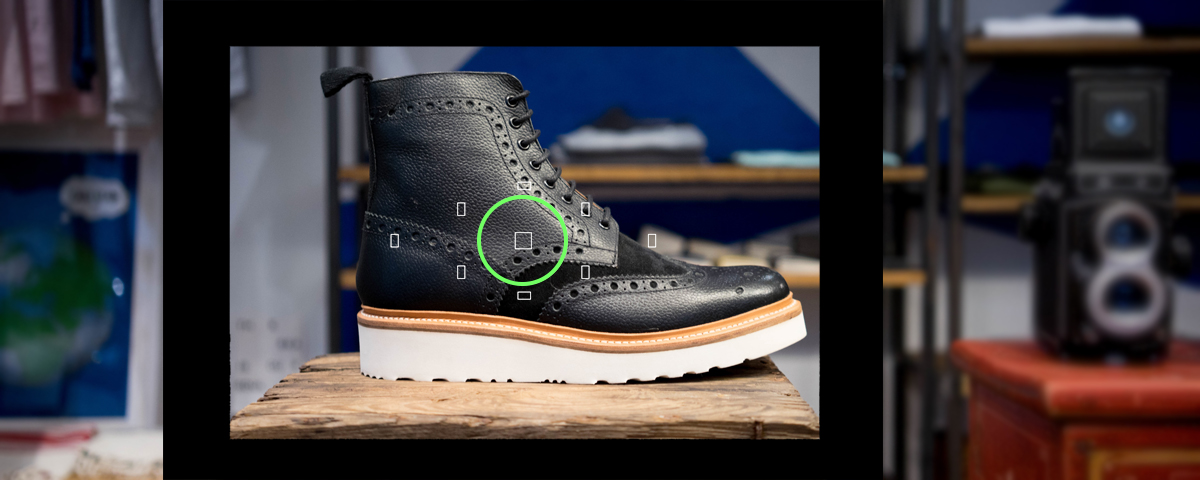
The settings you’ll need depend on your setup, and the amount of light you have. If you have an SLR camera you’ll need to adjust accordingly. If you’re unsure what to use, you can always start by checking how it turns out using the Auto mode, then adjust based on what you learn from there. Maybe you’ll need to switch to a different mode and adjust the exposure or aperture. Since we’re aiming for a setup with plenty of light, you can keep the ISO low. You can experiment with the aperture to get the soft background effect, and make sure that only your product is in focus. This will help mask any imperfections in the backdrop.
If you’re using a camera with on-body flash, make sure to turn it off, as front flash won’t work well with the light/backdrop setups we have covered in previous sections.
If you are using a consumer grade camera or are working with a zoom lens you don’t want to be too close to the product to avoid distorting the image. Step back a bit and zoom in to get the best shot. For consumer grade cameras, make sure that you are only using optical and not digital zoom. Digital zoom will decrease the quality of the image.
On a mobile phone, don’t use digital zoom. In this case, you can get closer to the image, as most phone cameras are not wide enough to cause distortions. Still, don’t get your product too close; leave enough white space and ensure that your phone can focus the product correctly.
As we said earlier, tripods are very welcome and should be used both to stabilize your shot and make it easier to take multiple shots from the exact same spot. If you don’t have a tripod, you can use another piece of furniture to place your camera on. Also, you may want to mark the spot where your camera stands if you accidentally move it when rotating products.
Shooting
Once everything is ready and the product is placed against the backdrop, you can start taking photos. After taking the first few test shots, review them to find what can be improved. You may want to review the images on your computer screen to get a better sense of the image quality.
It’s worth tweaking the light and backdrop setup, product position, and camera settings to get the best possible image. Once you’re happy with the results you can take shots at other angles to cover everything that’s relevant for your product.

Post-processing
When the photo session is done, it’s time to select and edit the images. First, you’ll need to group the images by product and select a crop that will be consistent between shots. The product should be placed in the center. If there are shots from different angles, or if the products vary in shape, you’ll need to choose a middle ground that’s aesthetically pleasing.
If you already have some photo editing experience and an editor you like to use, you’re good to go. If you don’t have photo editing software, it’s time to find some. You can always sign up to a free one-month trial for Adobe CC Photoshop or Lightroom or Corel Paint Shop Pro X8. If you prefer open source software, you can try GIMP. If you would prefer a simpler user interface with basic options, you can try photo viewers/organizers that have some editing capabilities, such as PhotoScape, XnView MP or Picasa.
And in case that you don’t want to install anything, you can still use online web apps like Pixlr Editor.
Make sure to compare the end results as you edit the images to ensure that you’re following the same style. If applicable, you can even create Actions or Macros in your photo editor of choice by recording the steps and apply them to your images in bulk.
Since photo editing is crucial for professional-looking product photos, take your time until you’re pleased with the results. The photo should be bright and vibrant, but still look natural. If you were working with a white background, adjust and tweak it to be perfectly white on your screen.
Now that you have mastered the process, you can use this setup to take photos of all of your products.
Having quality product photos is one of the most important factors on the successful ecommerce web store. If you need any additional advice about product photography, or you have questions about setting up your own store on the internet – contact us and we will be happy to help you out!


[…] 8. Product Photography— One of the most frequently forgotten aspects of building an online fashion brand is product photography. Most customers won’t have anything to go off of other than how your products are portrayed in images online. Services like POW Product Photography will handle this process for you. If you’re feeling a bit more adventurous, several online DIY resources will help you take beautiful photos yourself. If you decide to go this route – be sure to check our detailed guide about product photography! […]
[…] the visual heavy lifting for eCommerce listings, and we address the impact of product photography here, but the copy of the product description should also be drafted with visual elements in mind. While […]
If the camera setup is good enough and if the background has been chosen wisely then its possible to avoid the post processing task many times. Having said that the product shot can be possible to look better by applying some basic editing like background removing and retouching in Photoshop.
Thank you for the comment – you are 100% right, having a good initial camera setup and proper background can save you a lot of post processing work later.
This is really an outstanding thought, I’ve taken many photographs a day to edit them and I saw some of them are very special like what you said (“If the camera setup is good …..”) And we can offer a great price on such type of photographs to edit them.
You are absolutely correct.
Much Appreciate! Very Helpful Article.
Thank you Mary, we are glad that you find it useful!
I like your blog it’s amazing now i am going to bookmark it. n ecommerce photography || ecommerce apparel photography || ecommerce fashion photography in mumbai || product image editing in mumbai
its very authentic tips and its very helpful for me.
Great article!! Your in depth research will help me an amateur photographer like me.
I think we can simple avoid the post processing task, that’s not that much important to me, if I have a good camera setting. But I really like that you have talked about some of the important tips of photography in our article. This is nice.
Very informative article. This article will give you a good idea. Ecommerce website holder like remove background. Thanks for sharing your post.
Hi, take a photo with the white background. You have really made this article so interesting with some fantastic tips. Thousands of thank.