When you’re ready to submit your Android App to Google Play, you’ll need to also submit a bunch of additional content. Next week, we’ll get into optimizing your content– this process, called App Store Optimization, is similar to SEO on the web. But first, here’s a basic list of what you’ll need in order to get your app submitted in Google Play or the Apple App Store.
Android:
-
Title– This can be between 10 and 30 characters, and will be the same as the name shown to the customer in Google Play.
-
Description– Detailed description of the application and summary of the app. Up to 4,000 characters.
-
Promo Text– This will only be used if your app is featured by Google– should be an 80-character or less description.
-
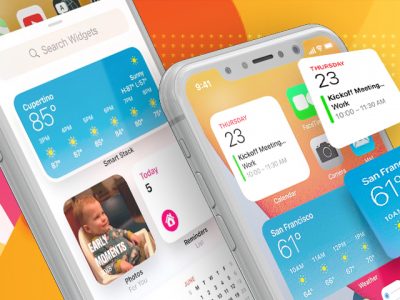
Screen Shots– You can include up to 8 screen-shots of your application running; a minimum of two is required. These screen-shots can be submitted in JPEG or PNG format, and each side must be between 320px and 3840px. Google recommends submitted screen-shots of the application running on a 7” or 10” tablet. 512*512 image of the app icon. You can also add a promo video which runs 30 seconds to 2 minutes in length by submitting a YouTube link.
-
Application Type– Application or Game– simple enough, right?
-
Category– You can view category options by clicking on “categories” at https://play.google.com/store/apps.
-
Content Rating– Options for rating are limited to “Everyone,” “Low Maturity,” “Medium Maturity,” and “High Maturity.”
-
Website– Where can customers find you on the internet?
-
Email– How will customers reach out for support?
-
Phone (Optional)
-
Privacy Policy URL (Optional)
iOS
-
Title– Between two and 75 characters, this is the name of your app as it will appear on the store.
-
SKU Number– Make it unique among YOUR apps and can include letters, numbers, hyphens, periods and underscores.Users will not see this.
-
Bundle ID– Used by iOS and OS X to recognize any future updates to your app, this identifier must be registered with Apple and be unique to your app.
-
Description– Up to 4,000 characters.
-
Category/Categories– You can assign your app to one or two categories. When your app appears in search results, it’s shown under the category you have set as “primary.” View your options through your Apple Developer account.
-
Content Rating– All apps are required to have a rating, as this helps inform parental controls on the store. To determine where your app stands, Apple provides a useful chart here.
-
Marketing URL– Where can customers find you on the internet? If you have multiple apps, consider creating a unique landing page for each.
-
Support URL– Where can customers find contact details for support?
-
Privacy Policy URL
-
Copyright– Include the year, along with the name of the person or organization who owns rights to the app. For example, 2020 FarShore. Apple adds the copyright symbol automatically.
-
Contact Information– Apple now requires a contact name, email and phone number if the App Review team has questions about your app. This is only for internal Apple use and will not be published to the App Store.
-
Screenshots– You may only have a split second to convince a person to download your app, and images are an easy way to make a great (and quick) first impression. Apple requires one to five screenshots for each device type (3.5-inch retina, 4-inch retina and iPad). We recommend you take advantage of all five, placing the strongest image first.
-
Icons– These need to be 72 dpi, RGB, without transparency, and in JPEG, TIFF or PNG format. The large app icon, 1024 x 1024 px, is used on your app’s store page and, if you’re lucky, to feature your app on the App Store home page. The small app icon (57 x 57 px for iPhone and iPod touch, 50 x 50 px and 72 x 72 px for iPad) is for the user’s device Home screen after install. All your submitted icons should match for brand consistency.
-
Desired Availability Date– This is the date when you would like your app to be available for download on the store. Due to Apple’s unpredictable approval process, however, this isn’t guaranteed and we do not recommend planning a marketing campaign around this date. If your app is not approved by Apple before the date you specified, it will be posted as soon as it has been.
-
Demo Video (Optional)– New to iOS 8, the promo video is optional but a great way to drive downloads.
-
End User Licensing Agreement (Optional)– Apple will use a default EULA if you don’t have your own.
Apple Approval Process
Once Apple has received your app and its materials, it undergoes a series of tests to make sure it’s ready for the App Store. With FarShore partners, we’ve found the approval process averages about one week.
While the approval process is a well-documented source of frustration for app makers, it’s ultimately to the benefit of the app maker. For apps that aren’t initially accepted into the store, Apple gives the developer clear feedback on how to improve
the product and increase the likelihood of securing approval after resubmission.
When you have all of these things ready, you can send them to your development contact for submission. We strongly recommend that you read the next two sections of this series before submitting, however.
Next week, we’ll get into optimizing this content– this process, called App Store Optimization, is similar to SEO on the web.